


Protect Your Property from Coastal Moisture
Living in a coastal town like Gansbaai offers incredible views and fresh sea air, but it also exposes homes and buildings to high levels of moisture...
Adding a timber deck to your home gives you more usable, comfortable living space and also adds value to your property.
Your tools:
• Line Level
• Spirit Level
• Tape Measure
• Builders Line
• Screw Gun
• Spade
• Skill Saw
• Mitre Saw
• Hammer
• Drill & Bits
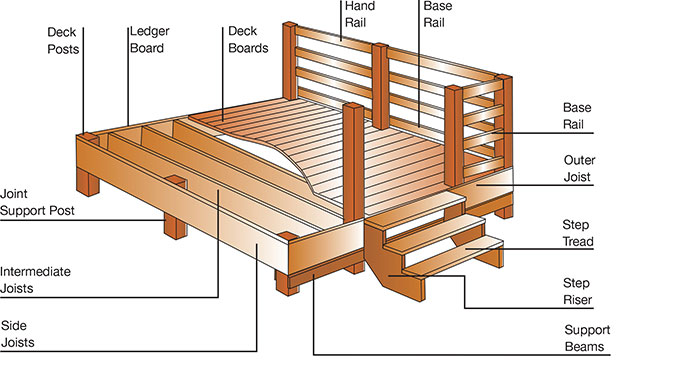
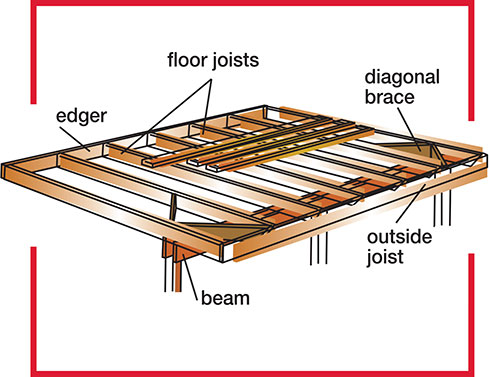
Deck terminology
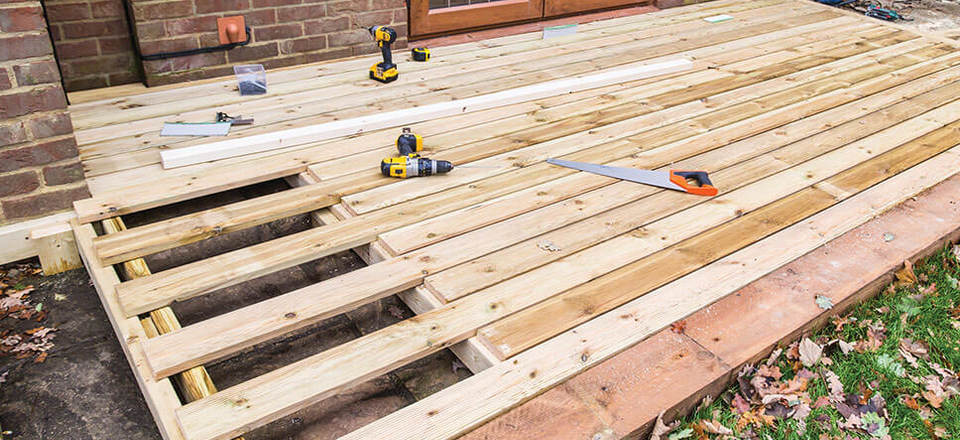
1. Mark off the deck area
Using a string and profile boards, mark off the area that your deck will cover. Using a line level, make sure the strings are level. The strings will give a visualisation of the area of the deck and will serve as a guide for the posts and joist positions.
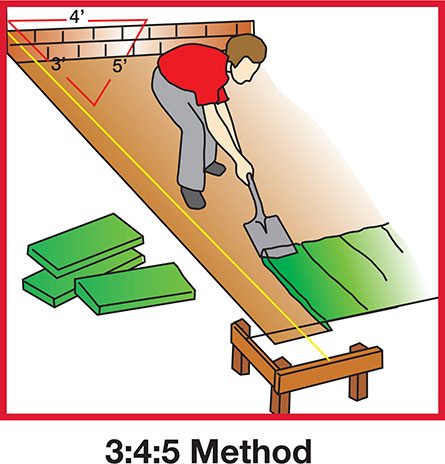
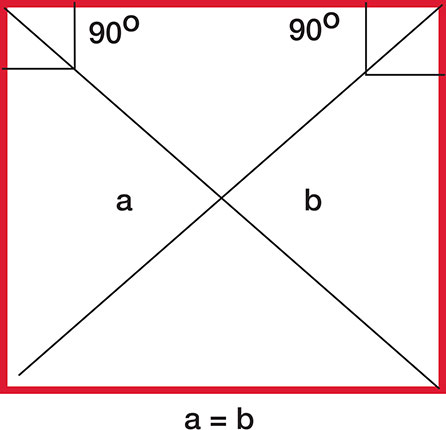
To make sure the area is square, do the following:
From the end of the string attached to the house wall, measure 3 metres along the string and mark with a felt pen. Measure 4 metres along the house wall in the other direction and mark. When the diagonal connecting these two points is 5 metres in length, the angle is 90o and the setup is square. (Use any 3: 4: 5 ratios.)
Make sure the diagonal distances between the two corners are the same.
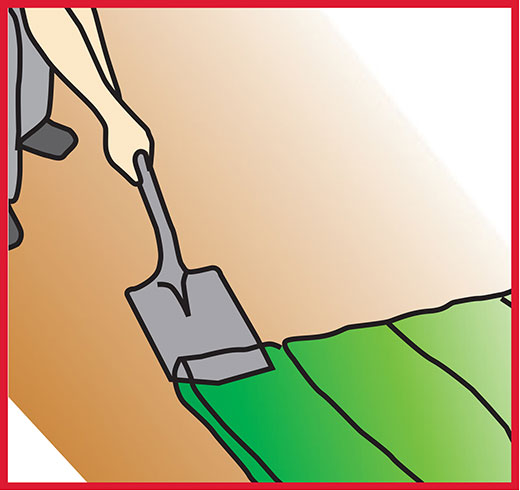
2. Clean the site
Remove all grass and other vegetation from the area that will be covered by the deck.
To ensure that all vegetation does not regrow, cover the area with USB material. This sheet can be covered in gravel or pebbles.
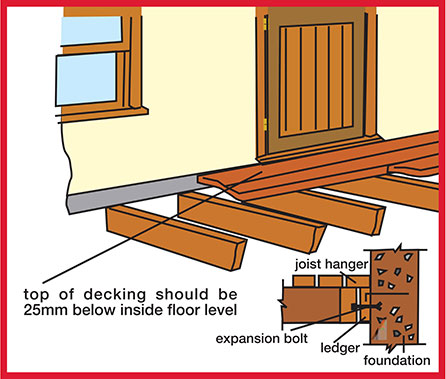
3. Attaching the deck to the house
Install the ledger board to the brick wall using expansion bolts. As the ledger board will determine the level of the deck floor, make sure that it is at the correct height and is level. Note that the thickness of the deck boards must be allowed for. The deck should be below the DPC level.
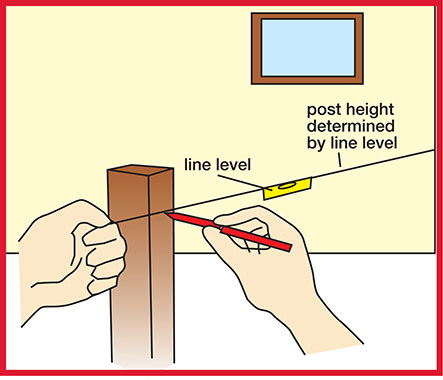
4. Install the posts
Once the position of the posts is determined, mark the ground using a plumb line to get the position for the holes. The holes should be 500mm deep. Fill the bottom of the hole with 50mm of stone.
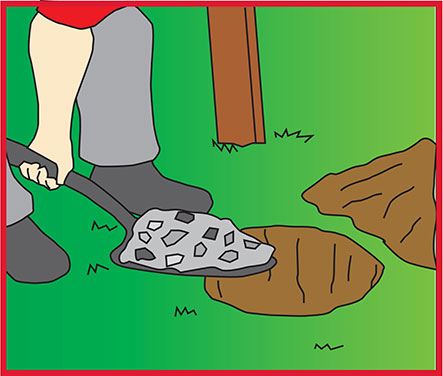
Then position the posts on this. Pour concrete into the hole and then ensure all posts are vertical and in alignment with one another. Support until the concrete is set - allow 24 hours. Ensure deck posts and joint support posts are CCA treated to a H4 specification.
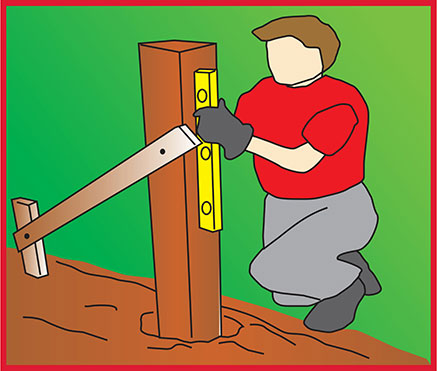
5. Fitting beams to posts
Check that the concrete is set. If the string has been removed, reposition it.
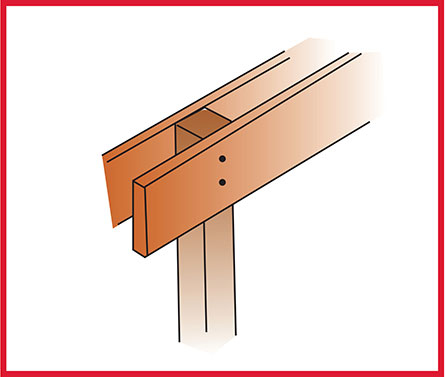
Using a line level, transfer the height from the bottom of the ledger board to the posts. This will be the height that the top of the beams will be connected to the posts. Fix the beams to the posts as shown. Ensure ledger boards are CCA treated to a H2 specification.
6. Attach joists
Mark the intermediate joist positions on the ledger. Intermediate joists are attached to the ledger using galvanised screws and joist hangers. The same joist positions are then transferred to the beams and outside joist. The intermediate joists are also fixed at these positions. Each outside joist is fixed to the intermediate joist using 3 x 75mm galvanised screws - countersunk. NOTE: Maximum cantilever is twice the nominal width of the timber i.e. 152mm wide joist cantilever is 152 x 2 = 305mm. Ensure intermediate and side joists are CCA treated to a H2 specification.
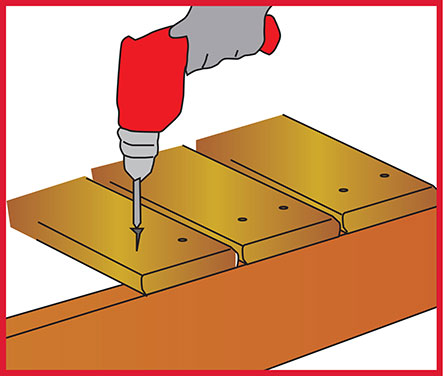
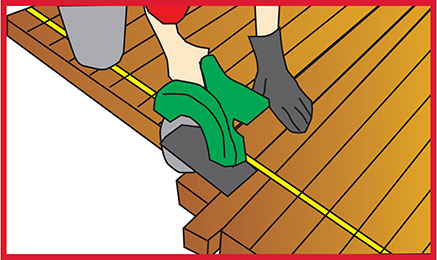
7. Install deck boards
All deck boards must be fixed using zinc-coated decking screws (two screws per joist fixing). Whilst different decking patterns can be used, the simplest is to have boards of equal width set on the joists, with a small gap between the boards of ± 3mm. When laying decking, always keep checking the spacing and measurements from the starting point to ensure that the decking is laid evenly and parallel. If required, make small adjustments in the spacing. Note: Avoid cupping install boards with the growth rings pointing down. After fixing, cut all decking boards to ensure a straight line. A very neat finish is to cut boards flush with the joist and install a fascia.
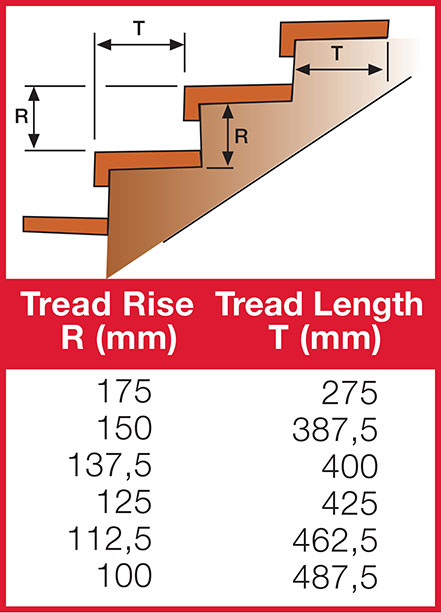
8. Install steps
For construction, measure the vertical rise from ground to deck surface and choose the best riser size for each step. This will give the number of steps. Also choose the best tread length from the table. Note the most popular is a 175mm rise to a 275mm tread length. The number of steps multiplied by the tread length gives the overall run of the stairs.
9. Install railings
Install posts for the railings at the required positions. The railing posts are bolted to the joists as shown. Ensure all railing posts are vertical. Once fixed, the horizontal railing supports can then be fixed to the posts, one 100mm above the deck, and one at the top of the post as shown.

Gansbaai Build it Plus forms part of the fastest-growing hardware and building materials group in Southern Africa. The Build it name embraces all activity within the hardware and building industry and supplies quality building materials at the best possible prices for large and small-scale building ...
View ProfileXplorio is your local connection allowing you to find anything and everything about a town.
Read MoreLiving in a coastal town like Gansbaai offers incredible views and fresh sea air, but it also exposes homes and buildings to high levels of moisture...
Living in a coastal town like Gansbaai offers incredible views and fresh sea air, but it also exposes homes and buildings to high levels of moisture...
Living near the coast has many advantages, but it also creates unique challenges for maintaining your home.
Renovating your home is one of the best ways to increase property value, improve functionality, and refresh your living space.
Whether you’re tackling a small leak, installing a new bathroom, or upgrading your kitchen...
We provide a full range of construction and DIY supplies at competitive prices.


