


Protect Your Property from Coastal Moisture
Living in a coastal town like Gansbaai offers incredible views and fresh sea air, but it also exposes homes and buildings to high levels of moisture...

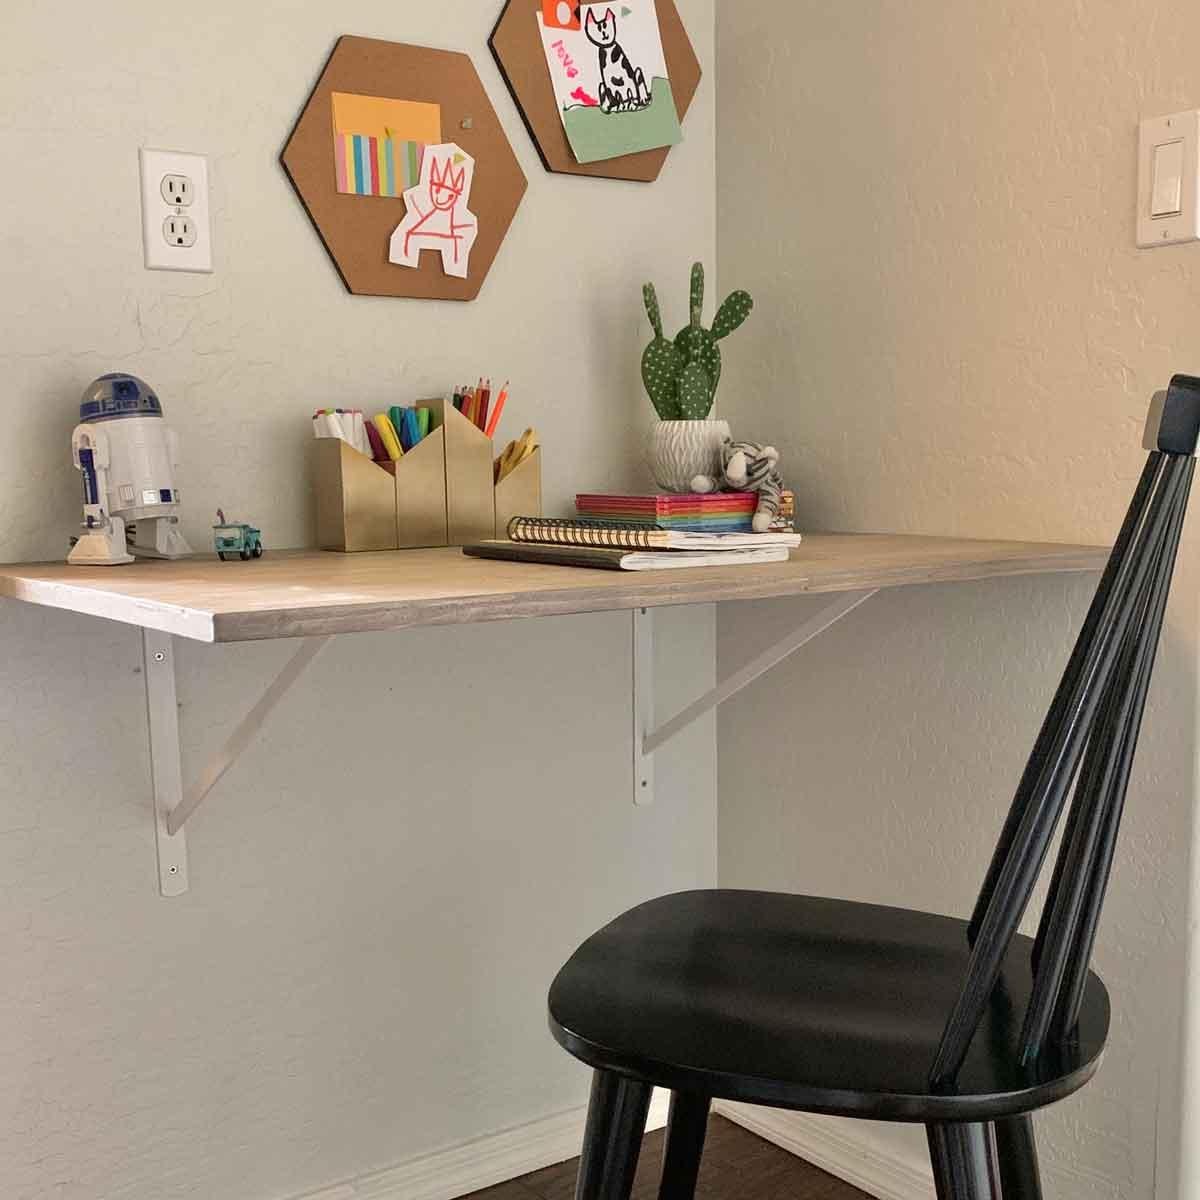
We will show you step by step how to build a wall mounted desk for your child in less than a day.
With this easy to follow project, we will have you feeling like a DIY professional in no time!
To get started, simply choose an empty wall in your child’s room where they will be doing their homework and follow these easy steps.
Below you will find a list of tools and materials required to complete this project.
• Carpenter’s pencil
• Clean cloths
• Electric sander
• Level
• Paint brush
• Power drill
• Protective gloves
• Tape measure
• 180-grit sandpaper
• 19-1/2-in. metal shelf brackets (2)
• 60cm x 1 Meter pre-cut wood board (1)
• 5cm wood screws (6)
• 5/8-in. wood screws (6)
• 80-grit sandpaper
• Wood conditioner
• Wood stain
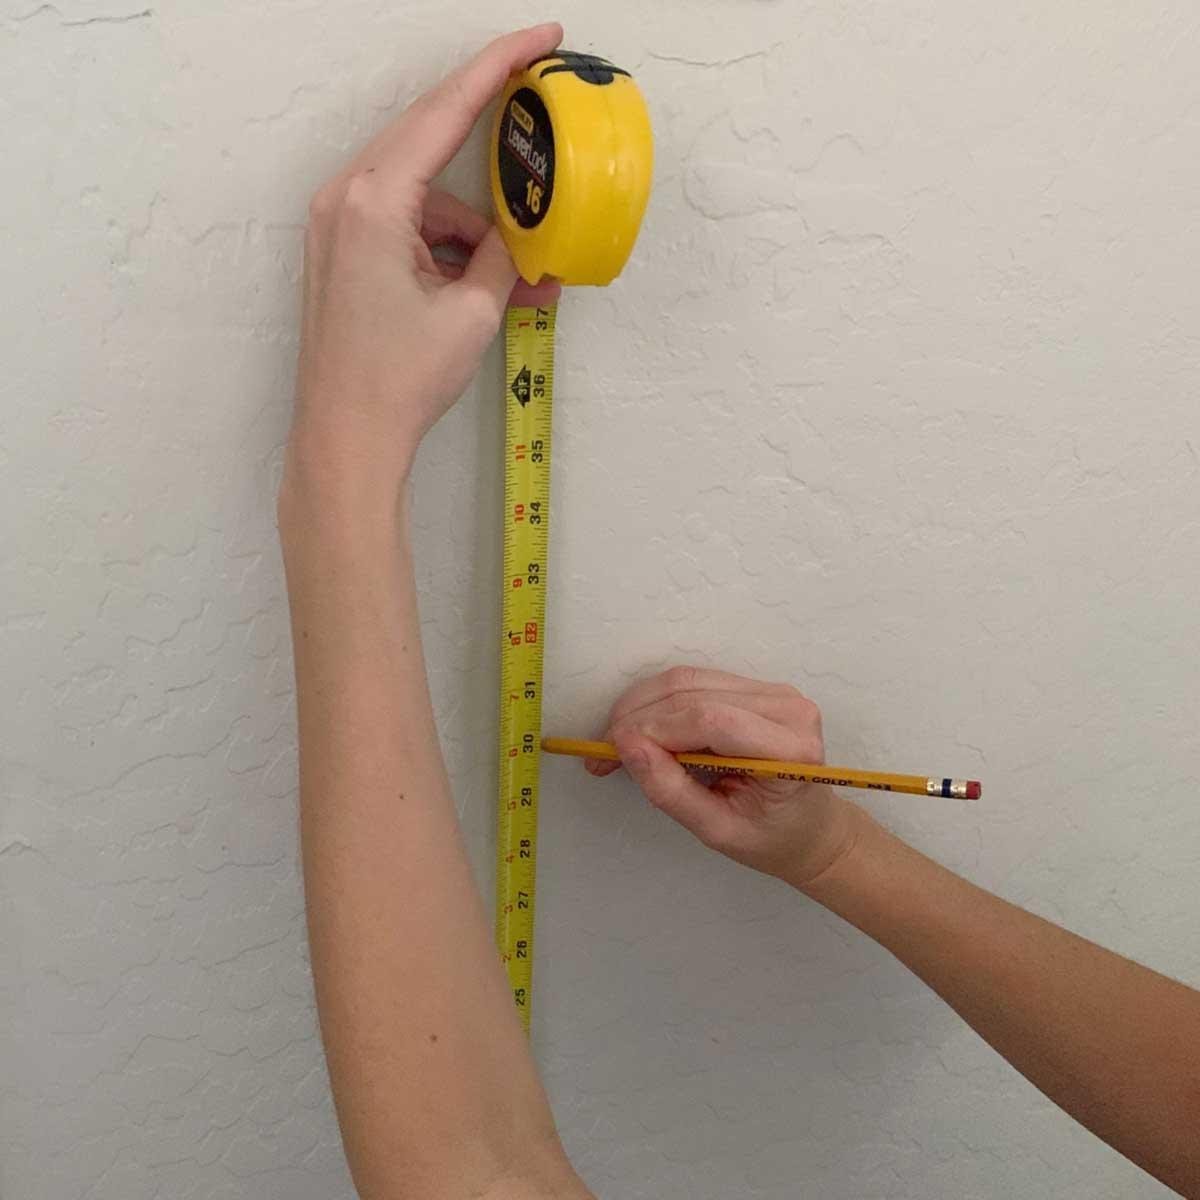
The desk hight should be about 65cm for a young child but keep in mind that children grow so we have set the desk hight at 75cm.
Measure the height of the desk against the wall and mark the spot with a pencil.
You will need about 25cm between the top of the chair and the bottom of the desk for comfort.
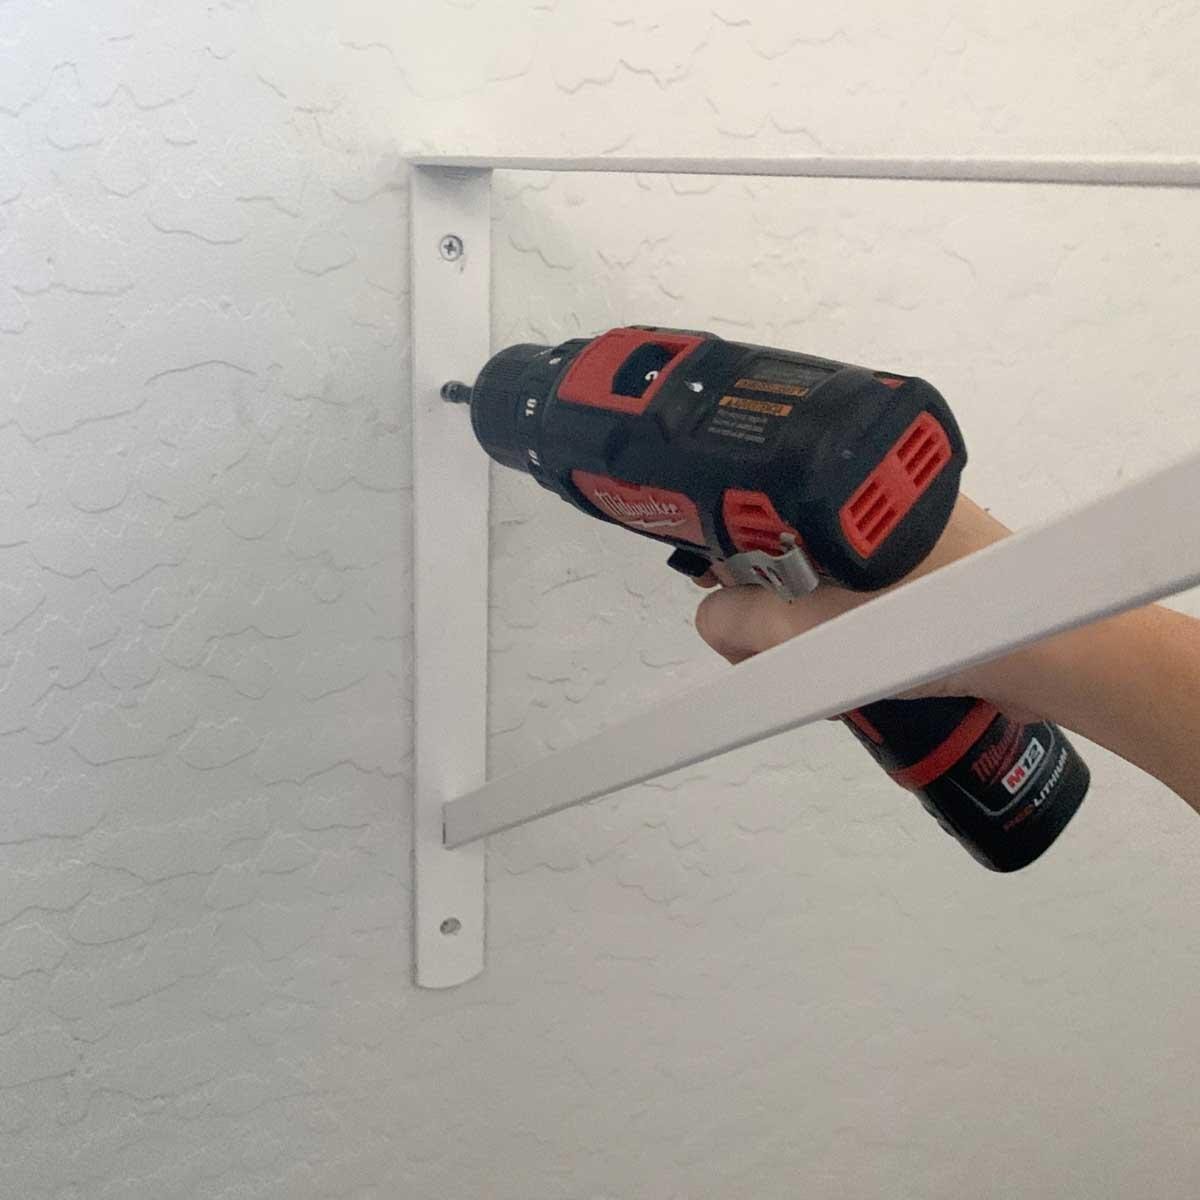
Use a level to make sure that your brackets are straight, then hold the bracket in place to secure.
Using your power drill and 5cm wood screws, attach the bracket to the wall.
So easy!
Now let’s do the second bracket!
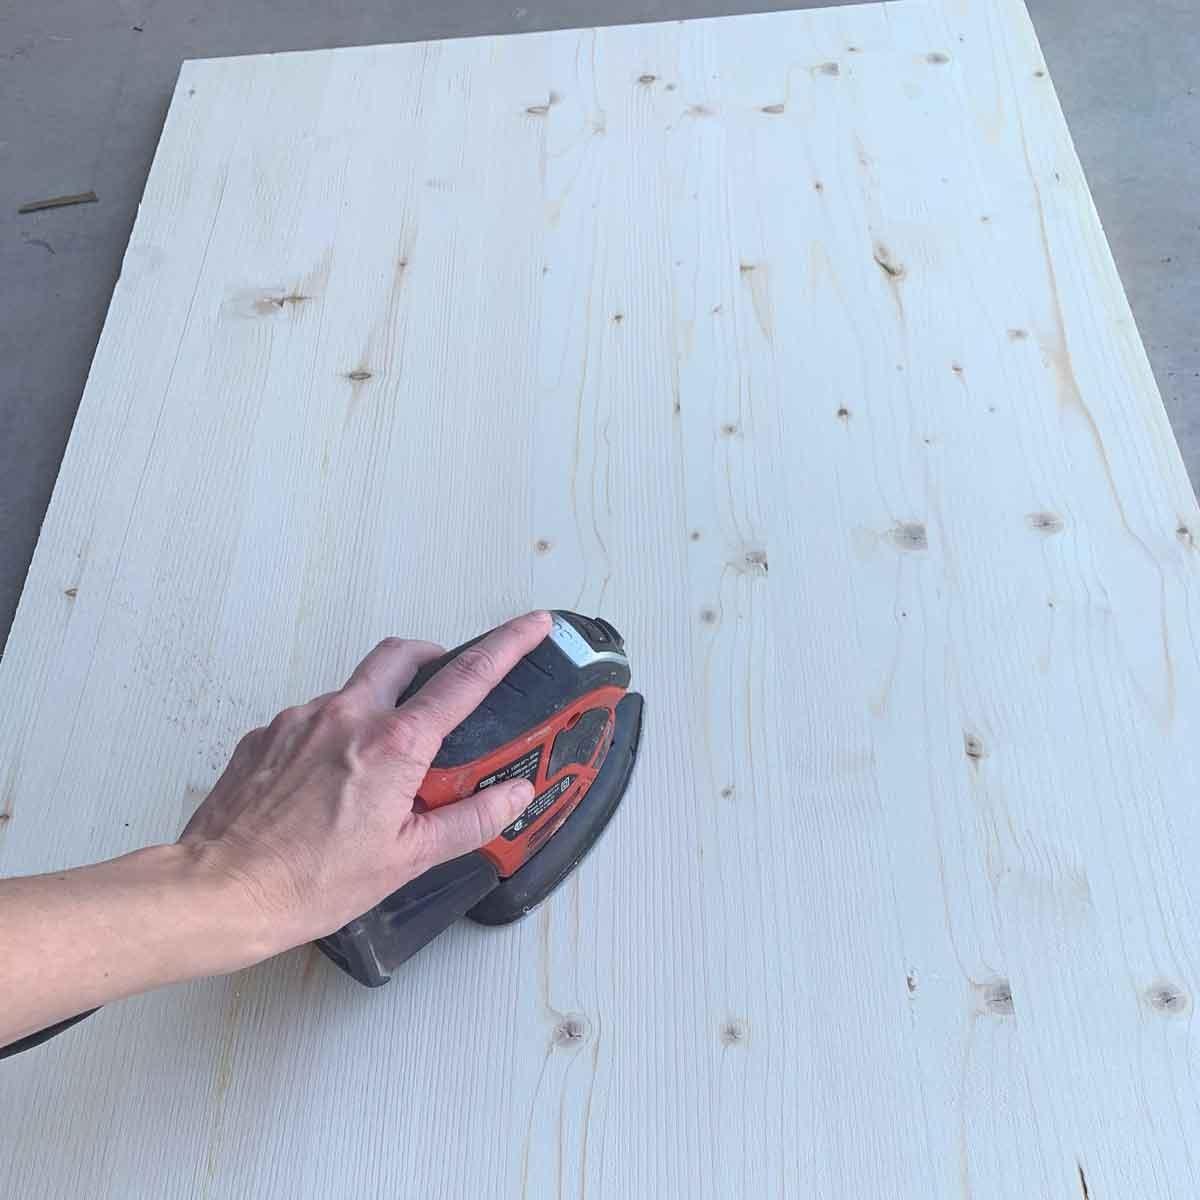
The objective of sanding wood is to remove mill marks, and other flaws that could have been introduced at the factory or in handling.
Sanding makes the surface of the wood smooth, improving the appearance and bringing out the natural beauty of the wood.
Prepare your 60cm x 1meter board which is to become the desktop.
Now sand the wood in the direction of the wood grain, which helps camouflage any scratches, with 80-grit sandpaper.
Then go over the wood again with 180-grit sandpaper;
Wipe the dust away with a dry clean cloth and rub your hand over the wood.
Is the wood perfectly smooth?
Great! Let’s continue.
The reason we treat the surface of the wood with Pre-Stain Wood Conditioner is that it helps prevent streaks and blotches by evening out the absorption of oil-based stains.
Wood conditioner can be applied on any wood for an even finish but is especially necessary when working with soft or porous woods like pine, alder, birch, and maple.
With your protective gloves on, apply wood conditioner to the Desktop with a clean cloth.
Leave to dry for a few minutes and you can move on to the next step.

What is the purpose of wood stain and how does it work?
Wood stain is a type of paint that is used to colour wood by soaking pigment into wood fibers with a solvent and then having it set and bind to the wood. Stain works by saturating colour into the wood itself, rather than applying a layer of colour over the surface of wood.
Perhaps the most common reason to use stain as protection is against ultraviolet light. Many stains help reflect UV light, which prevents wood surfaces from fading and losing their colour.
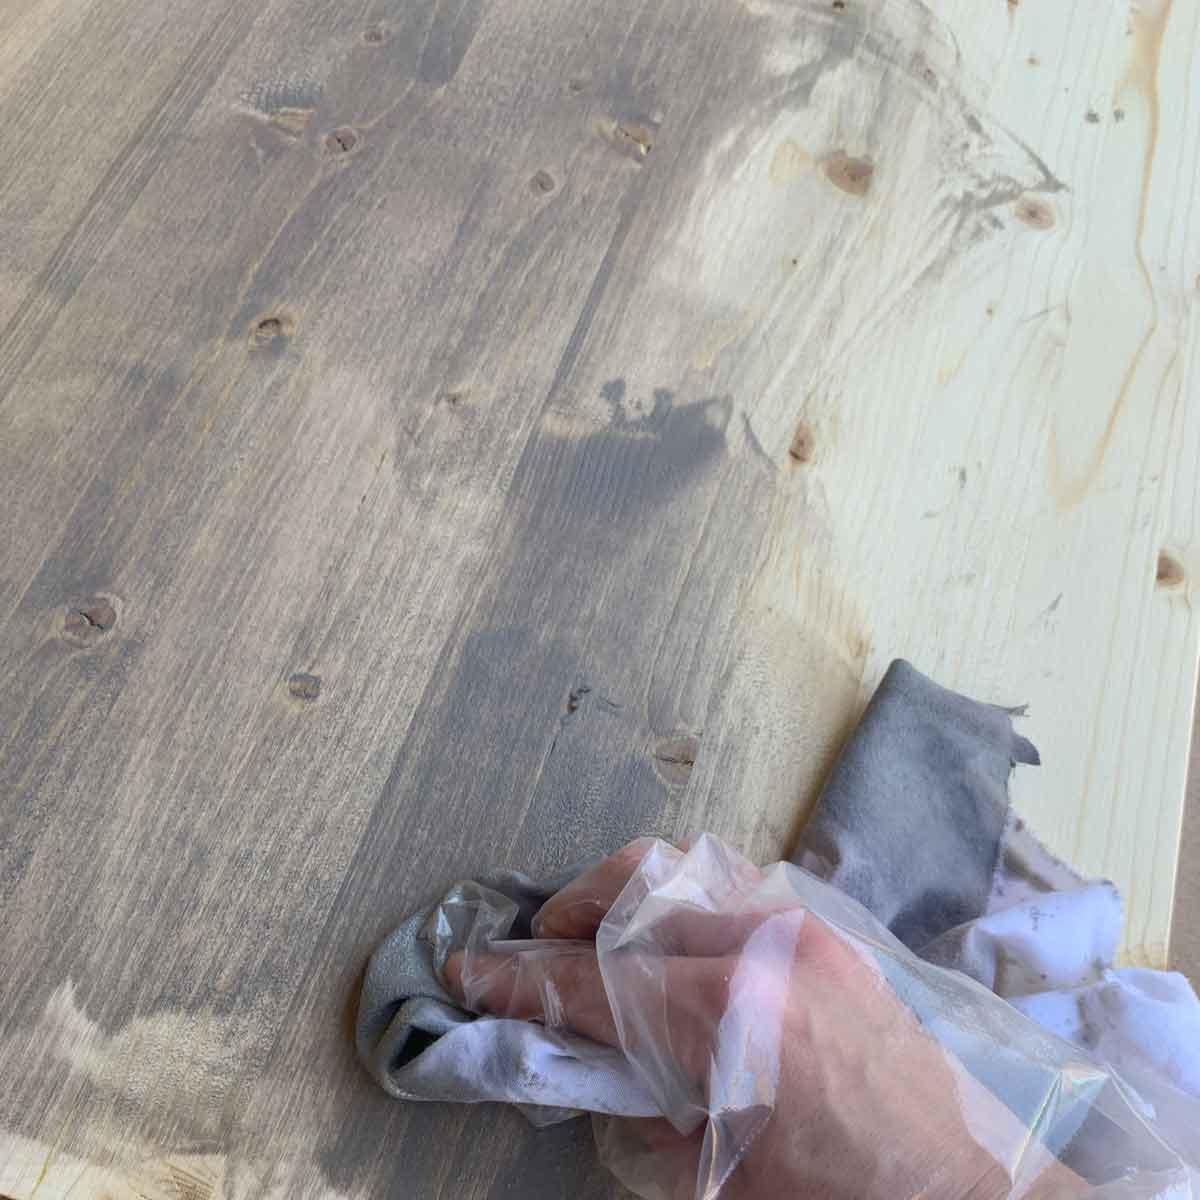
Using a clean cloth, apply the colour of wood stain you have chosen.
Always apply the stain in the direction of the wood grain for an even finish.
Let the stain dry for a few hours then repeat on the other side.
And now for our final step!
Once you have placed your board on top of the wall brackets, attach the board from underneath the desk by using 3 of your 8/5-in. wood screws.
Almost done, now let’s do the other side.
Good Job!
The only thing left to do is pull up a chair and decorate!
Gansbaai Build it Plus forms part of the fastest-growing hardware and building materials group in Southern Africa. The Build it name embraces all activity within the hardware and building industry and supplies quality building materials at the best possible prices for large and small-scale building ...
View ProfileXplorio is your local connection allowing you to find anything and everything about a town.
Read MoreLiving in a coastal town like Gansbaai offers incredible views and fresh sea air, but it also exposes homes and buildings to high levels of moisture...
Living in a coastal town like Gansbaai offers incredible views and fresh sea air, but it also exposes homes and buildings to high levels of moisture...
Living near the coast has many advantages, but it also creates unique challenges for maintaining your home.
Renovating your home is one of the best ways to increase property value, improve functionality, and refresh your living space.
Whether you’re tackling a small leak, installing a new bathroom, or upgrading your kitchen...
We provide a full range of construction and DIY supplies at competitive prices.


