A Guide to 5 Fun DIY Projects a Family Can Do Together This Winter
Winter is the perfect time to gather the family and embark on some exciting DIY projects. Not only do these projects bring the family closer, but they also allow everyone to unleash their creativity and develop useful skills.
At Build it Gansbaai, we are passionate about providing the highest quality building materials and tools to help you create wonderful memories with your loved ones.
Here are five fun DIY projects that your family can enjoy together this winter.
1. Build a Birdhouse
Materials and Tools Needed:
• Wooden planks
• Nails and screws
• Wood glue
• Sandpaper
• Paint and brushes
• Hammer
• Screwdriver
• Measuring tape
• Saw
Instructions:
Building a birdhouse is a fantastic project that brings a touch of nature to your home and helps teach children about wildlife. Start by deciding on the design of your birdhouse. A simple rectangular birdhouse with a slanted roof is ideal for beginners.
1. Measure and Cut: Measure and cut the wooden planks to create the front, back, sides, roof, and base of the birdhouse. Ensure all pieces fit together perfectly.
2. Assemble the Base and Sides: Use wood glue and nails to attach the sides to the base. Make sure the structure is stable.
3. Attach the Front and Back: Secure the front and back pieces to the sides and base using screws.
4. Create the Roof: Attach the roof pieces, ensuring they meet at a slant to allow rainwater to run off.
5. Sand and Paint: Sand down any rough edges and paint the birdhouse in vibrant colours to attract birds.
6. Install: Once dry, hang the birdhouse in your garden or backyard.
2. Create a Family Photo Wall
Materials and Tools Needed:
• Photo frames
• Printed family photos
• Nails and screws
• Hammer
• Measuring tape
• Level
• Pencil
Instructions:
A family photo wall is a heartwarming project that showcases your cherished memories. It’s a wonderful way to personalize your home and can be easily updated with new photos.
1. Select Photos: Choose a variety of family photos, including portraits, candid shots, and vacation memories.
2. Frame the Photos: Place each photo in a frame. Mix and match different frame styles for a unique look.
3. Plan the Layout: Arrange the frames on the floor to determine the best layout. Take measurements and use a pencil to mark where each frame will go on the wall.
4. Hang the Frames: Starting from the centre, use a level to ensure each frame is straight. Secure the frames to the wall with nails or screws.
5. Final Touches: Adjust the frames as needed and step back to admire your family’s collective work of art.
3. DIY Pallet Furniture
• Materials and Tools Needed:
• Wooden pallets
• Sandpaper
• Paint or wood stain
• Nails and screws
• Wood glue
• Hammer
• Screwdriver
• Saw
• Measuring tape
• Cushions (optional)
Instructions:
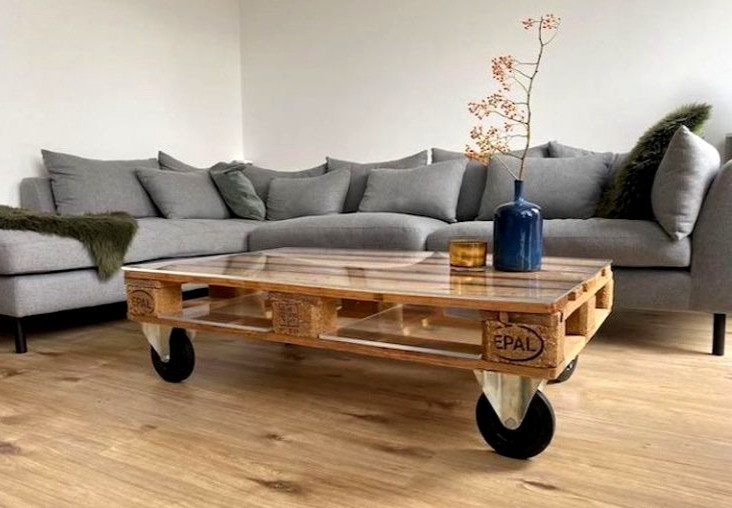
Pallet furniture is an eco-friendly project that adds a rustic charm to your home. This project is versatile and can be customized to create anything from a coffee table to an outdoor sofa.
1. Choose Your Design: Decide on the type of furniture you want to create. A simple pallet coffee table or bench is a good starting point.
2. Prepare the Pallets: Sand down the pallets to remove any rough edges and splinters.
3. Assemble the Furniture: Stack the pallets to your desired height and secure them together with nails and wood glue. If making a bench, add extra support by attaching additional planks.
4. Finish: Paint or stain the furniture to match your home’s decor.
5. Add Comfort: For seating furniture, add cushions for extra comfort.
4. Craft a Customized Chalkboard
Materials and Tools Needed:
• Wooden frame or large piece of wood
• Chalkboard paint
• Paintbrushes
• Sandpaper
• Tape measure
• Painter’s tape
• Screws and screwdriver
Instructions:
A customized chalkboard is a fun and functional addition to any home. It’s perfect for jotting down notes, making to-do lists, or letting the kids express their creativity.
1. Select a Surface: Choose a wooden frame or a large piece of wood to serve as your chalkboard base.
2. Prepare the Surface: Sand down the wood to ensure it’s smooth and free of splinters.
3. Apply Chalkboard Paint: Use painter’s tape to create clean edges. Apply the chalkboard paint in even strokes, following the manufacturer’s instructions. Multiple coats may be necessary for a smooth finish.
4. Dry and Cure: Allow the paint to dry completely and cure as recommended.
Mount the Chalkboard: Use screws to mount the chalkboard to the wall at a height that’s easily accessible for all family members.
5. Build a Window Herb Garden
Materials and Tools Needed:
• Wooden planks or pallets
• Small pots or containers
• Soil and herb seeds
• Nails and screws
• Hammer
• Saw
• Sandpaper
• Paint or wood stain
• Paintbrushes
• Measuring tape
Instructions:
A window herb garden is a delightful project that brings the joy of gardening indoors. It’s an excellent way to teach children about plants and the importance of fresh ingredients.
1. Choose a Location: Select a sunny window where your herbs will receive plenty of light.
2. Build the Frame: Measure and cut the wooden planks or pallets to create a frame that fits your chosen window. Sand down any rough edges.
3. Attach Containers: Secure small pots or containers to the frame with screws. Ensure they are spaced evenly.
4. Paint or Stain: Finish the frame with paint or wood stain to match your decor.
5. Plant the Herbs: Fill the containers with soil and plant your chosen herb seeds. Label each container for easy identification.
6. Install the Frame: Secure the frame to the window frame or wall, ensuring it’s stable and safe.
These DIY projects are not only fun and engaging but also provide valuable opportunities for families to bond and learn new skills together.
At Build it Gansbaai, we offer a wide range of building materials and tools to help you complete these projects with ease and success.
Whether you’re a seasoned DIY enthusiast or just starting, our expert team is here to provide guidance and support every step of the way.
Visit Build it Gansbaai to explore our extensive selection of high-quality building materials and tools.
Let’s make this winter a season of creativity, learning, and family fun. Happy DIYing! Don’t forget to follow us on social media to stay updated on our latest specials and offers!
Build it Gansbaai offers added value services in respect of hardware retailing; embracing all activity within the building materials industry, focusing specifically on the building of; urban, township, rural housing as well as all home improvements and do it yourself. Visiting Hermanus area? Stop by our Build it Hermanus store.
Build it is a division of the SPAR Group Limited South Africa. A voluntary trading group of individually owned retail stores with more than 10 000 employees across the group, we currently have stores in South Africa, Namibia, Swaziland, Lesotho and Mozambique with plans to expand into Botswana and Zambia in the near future. We view ourselves not only as a supplier of materials, but as a partner to our valued customers in accomplishing their building or renovating projects.


